Custom Properties
Custom Properties are similar in functionality to Labels. However, Custom Properties are attributes of Objects rather than Work Items.
This feature allows any Simulation Object to hold information about that Object in a similar way to Labels do for Work Items.
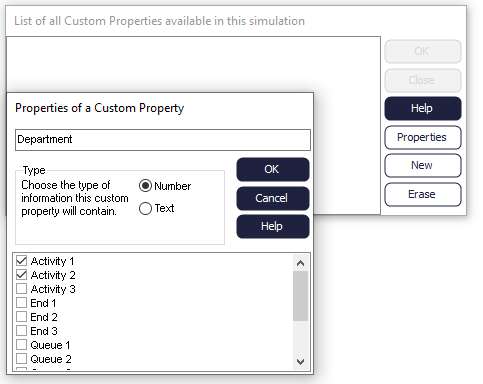
Custom Properties can be accessed from theBuild tab. There you can create a new property by clicking “New” on the dialog, and by ticking the checkboxes of each Object it applies to. In the following example we have created a Custom Property called “Department” that is assigned to Activities 1 and 2.

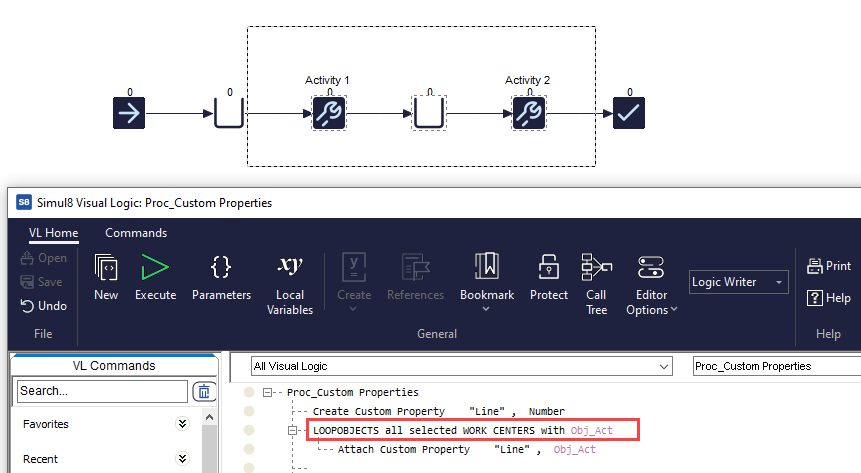
If you have many Objects to attach a Custom Property to, you can do this faster though Visual Logic. The Create Custom Property and Attach Custom Property commands are useful for this. An example of their use is the following:

This example shows how a Custom Property is created through Visual Logic, and how it is attached to each Activity via the LOOPOBJECT command.
A numeric value attributed to each Object automatically, you can assign Custom Properties specifically to the Objects of your choice. For instance, you may have Dummy Activities that don’t need Custom Properties, but you may instead wish to attach your Custom Property to the rest of the Activities. One way to do this, is to loop through the selected Objects. First, select your Objects of interest by drawing a rectangle around them with the mouse and then use the Loop on selected Object command:

You can reference Custom Properties through Visual Logic in the same way as you can identify all the default object properties. The property should be referenced in the following way:
Set Obj_Act.CustomProperty[“Department”] = 1
The value of a Custom Property for an Object can be viewed in the Watch Window and in Quick View.