Setting Up an SQL Database Query in Simul8
Before setting up a Database Query, you will first need to set up the Database Connection. This can be done either in Simul8 or by using Microsoft ODBC Data Source on your PC. For a guide on both methods, see our help file for Setting up a Database Connection.
In the following guide, we show you how to import and export data from databases in Simul8.
Database Query Setup
- On the Integrate tab, click on the SQL button.
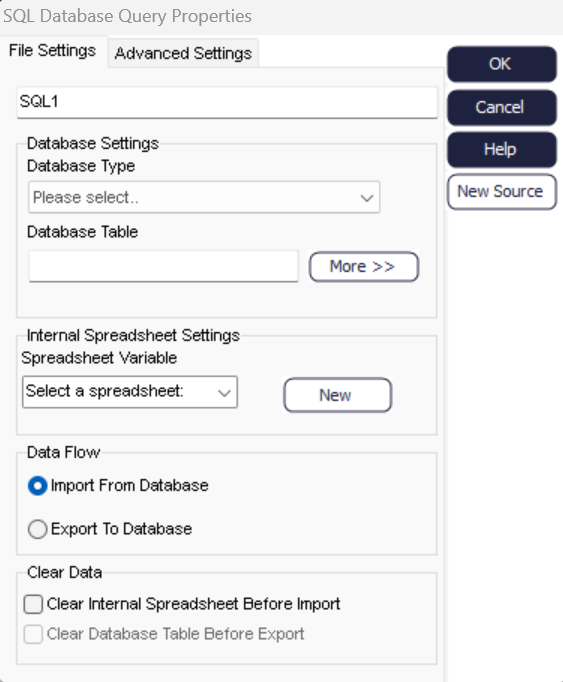
- Click the New button.
- Select the Database Type for the new connection that will be created. This will be as it is named in the ODBC set up or in the Simul8 Data Source dialog.
- Enter the Database Table name.
- If a Username and Password are required, click the More button to enter these.
- Select the Internal Spreadsheet that you wish to import the data to. If this does not yet exist, you can click New to create it.
- Set if this connection will be used to Import or Export the data.
- Click OK until you return to SQL Database Queries Form.

Advanced Settings
When importing, you can use the Advanced Settings tab to choose whether to 'Import All' or 'Custom'. The first option imports the whole data table while the second option allows for importing only part of the data according to some rules as shown next.
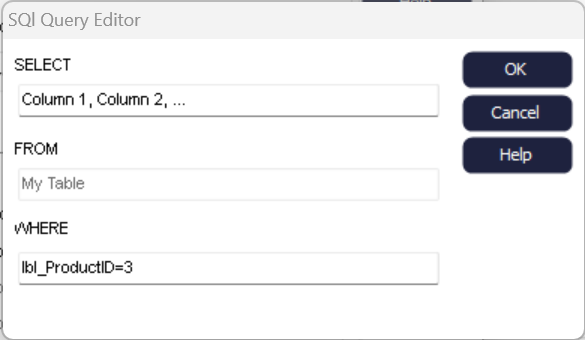
In the 'Custom' option, you can use the 'SQL Editor' to choose which part of the data to import.

- Use SELECT to we specify which columns to import - if you want to import all columns, enter an asterisk ( * ).
- FROM will pre-populate with your table name.
- In WHERE, set up which data items (row-wise) to import. In the screenshot above, only those with a value of 3 in 'lbl_ProductID' will be imported.
- The command as shown below can be used for the same result.

When exporting you can use the Advanced Setting tab to choose whether to insert the exported data into a database or update a database. The first exports the data by adding it into the first blank row after any existing entries. The second option updates existing entries by overwriting these.

After clicking OK on all the dialogs, the SQL Database Queries Form now includes the previously set up connection.
Running a Database Query
You can now use the Import/Export button to import or export the data to/from an internal spreadsheet. The connection can also be modified from here via 'Properties'.
Visual Logic commands for importing/exporting databases
In addition to the above, you can also read, write, insert or delete records in your database using SQL commands through Visual Logic. The Visual Logic SQL commands available are: